Creating Origami in the U.S. National Arboretum’s National Bonsai & Penjing Museum

Origami instructor, Jeff Raab

Origami instructor, Jeff Raab

A young participant holds her origami crane

A young participant holds her origami crane

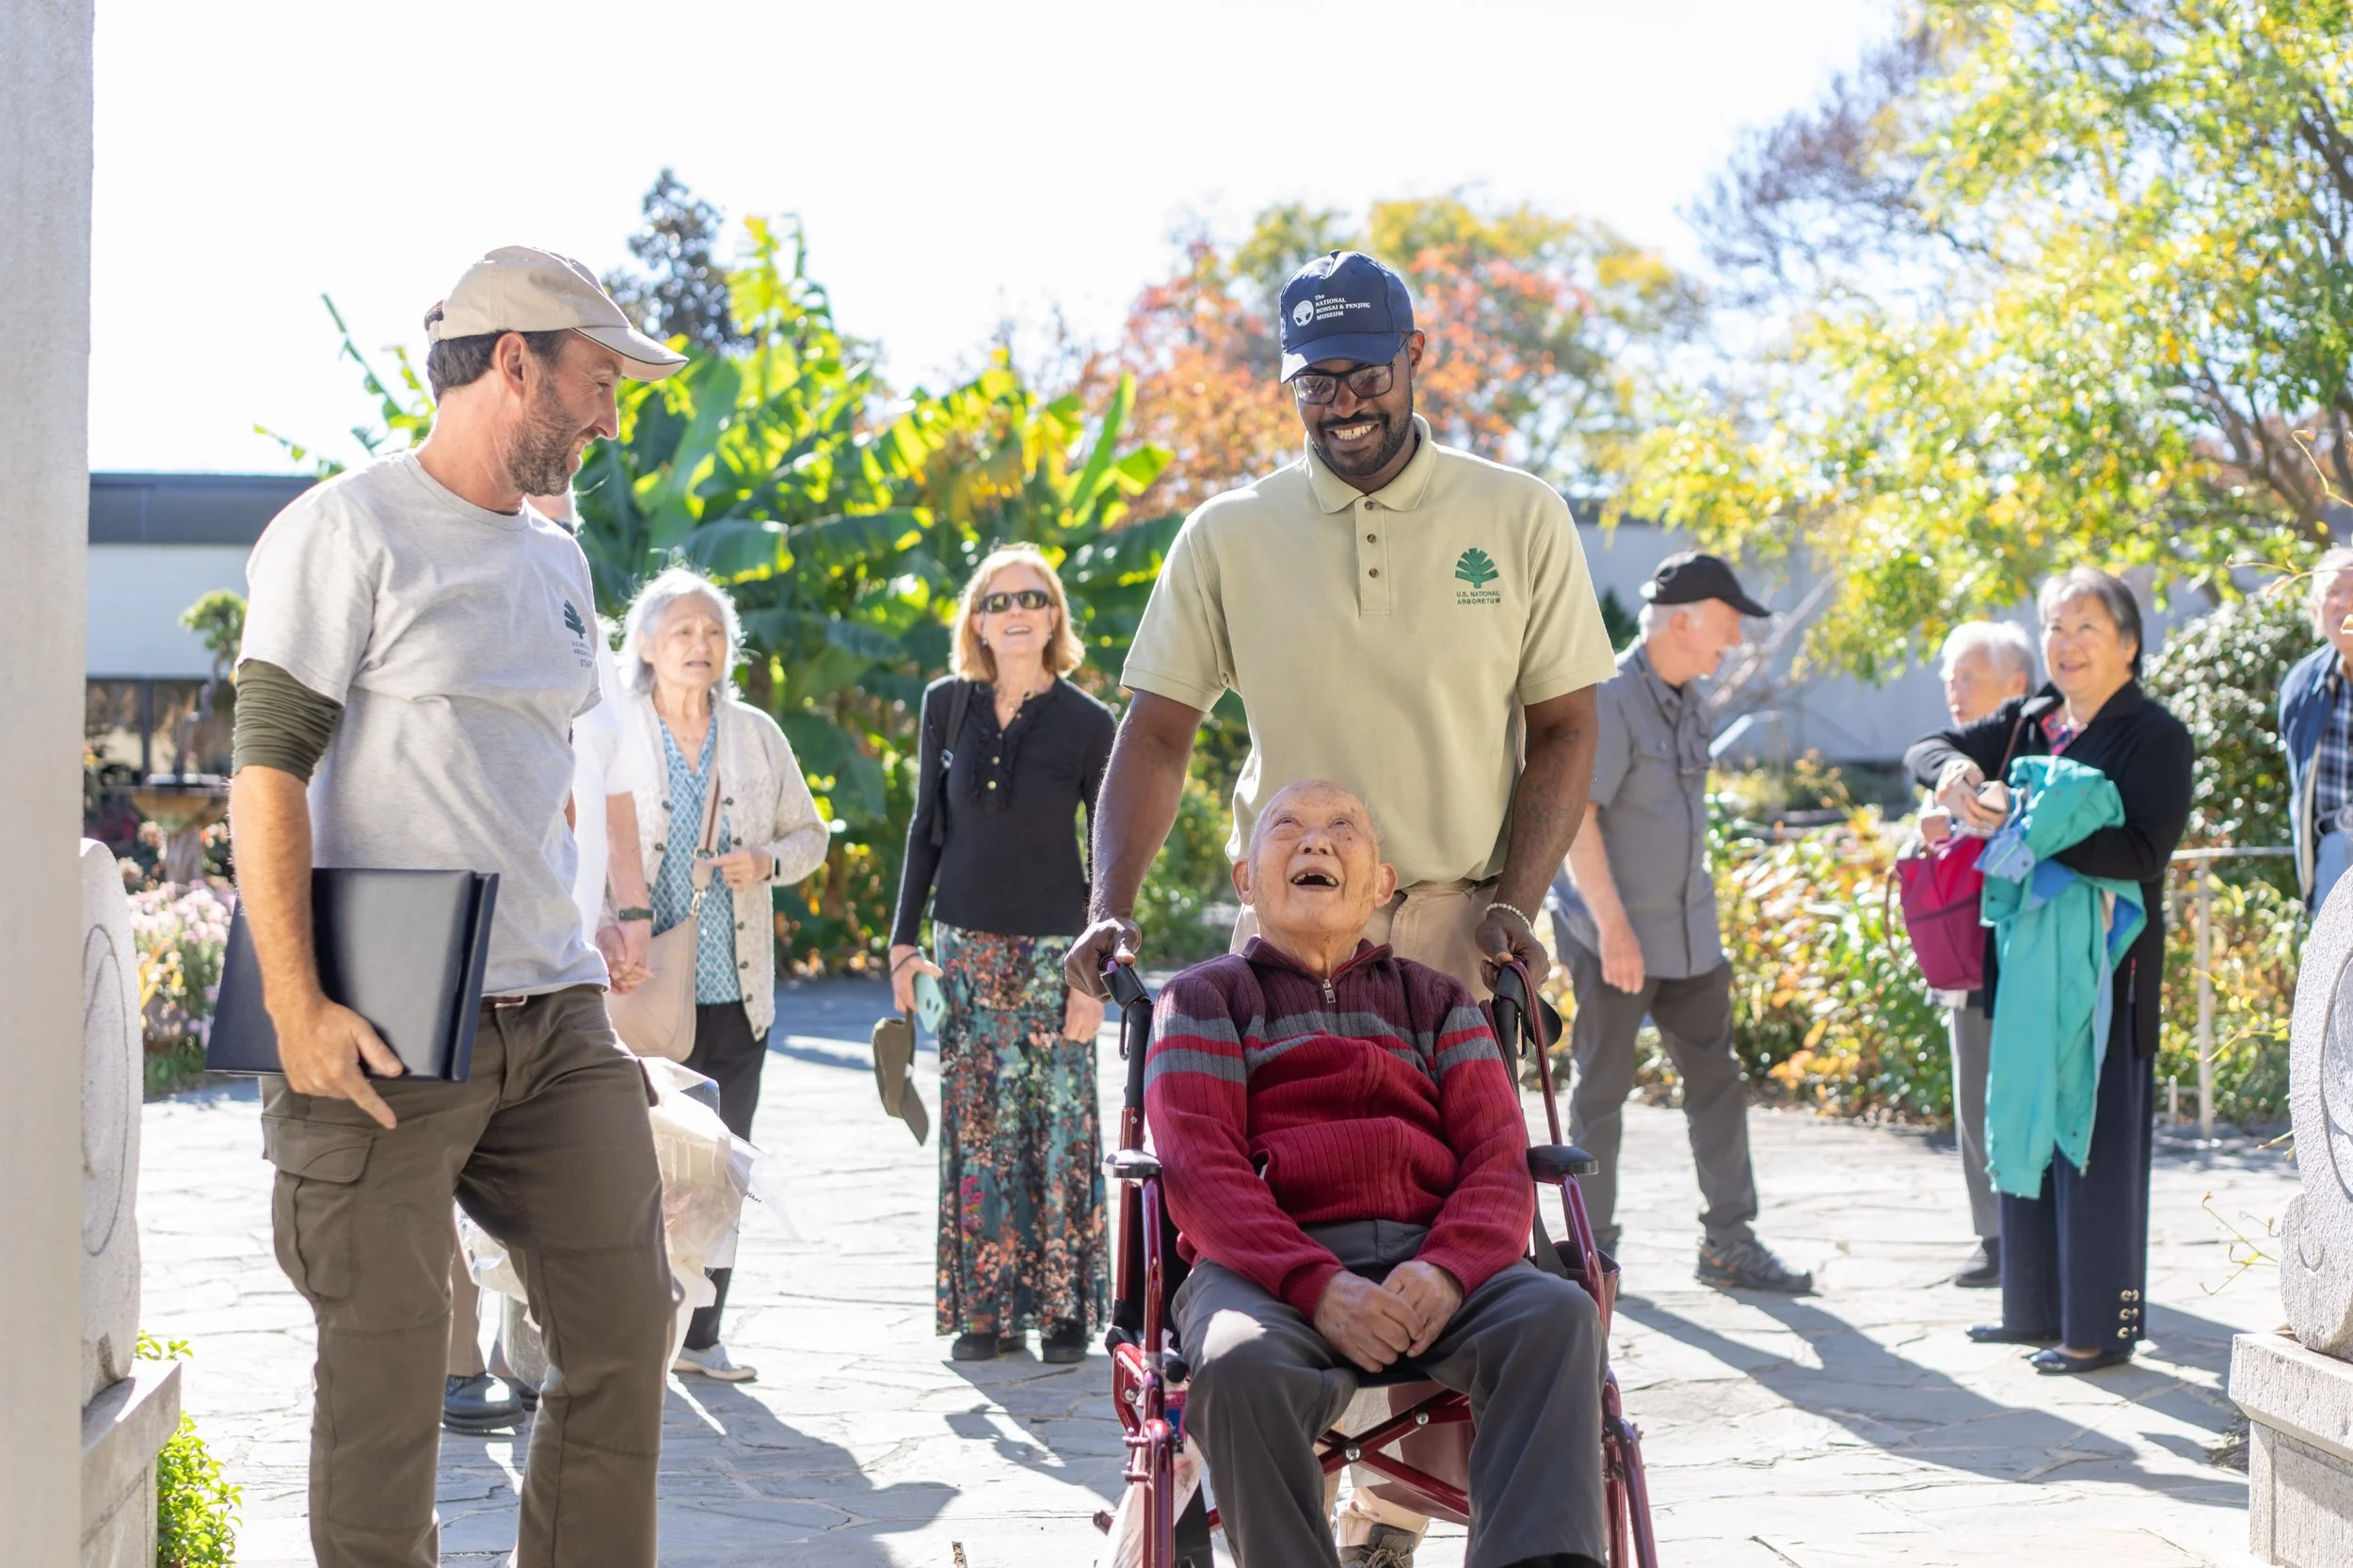
As one of the programs and classes offered at the National Bonsai & Penjing Museum, origami professional Jeff Raab led the Museum’s first-ever origami class in January. People of all ages and folding skill levels attended to learn different bases and models.

Raab started small, with a few simple folds and models, eventually moving to the quintessential paper crane, in hopes that attendants would then use their crane-creation skills to contribute to the National Symphony Orchestra’s effort to bring 1,000 paper cranes to the Children’s Peace Monument in the Peace Memorial Park in Hiroshima, Japan as part of their Asia 2020 tour.

Kennedy Center leader Andrew Brown wrote a note of thanks for everyone who participated in the project:

I am proud to report that the National Symphony Orchestra received more than 3,000 paper cranes sent from around the country. It was a remarkable response to our project in preparation for our visit to Hiroshima, Japan.

As I am sure you may have realized, the NSO tour to Japan was canceled due to COVID-19. After 15 months of preparation, we were very disappointed, but our offices were full of the most beautiful and colorful origami cranes. We continued to organize and string the cranes together even after the cancellation of the tour.

On Friday, March 6th, NSO musicians performed a concert at the Japan Information and Culture Center in Washington, D.C. On that occasion, we were able to present 2,000 origami cranes to Minister Takehiro Shimada from the Embassy of Japan, along with a special poster made by members of the D.C. Youth Orchestra Program.

All of the origami cranes presented will be carefully packaged and mailed to the City of Hiroshima along with a record of everyone who participated and shared comments as part of this project.

Click here to see photos of the journey of the NSO Paper Crane Project. It has been a pleasure to work on this project with you, and we thank you for your contributions towards this project in recognition of the 75th Anniversary of the end of World War II.

Sincerely,

Andrew Brown

Participants learned how to fold different figures

Participants learned how to fold different figures

While we are currently closed to mitigate the spread of COVID-19, we are looking forward to continue hosting our variety of workshops – from origami to forest bathing to tai chi – as soon as authorities permit reopening. We can’t wait to see you again!

Bonsai Basics: Soil and Fertilization Techniques

Bonsai Basics is a NEW blog series dedicated to providing beginner’s tips, tool recommendations and facts about basic bonsai tasks. Thanks to all of our readers who recommended we start doing this on our 2019 survey!

Getty Images

Getty Images

As the repotting season continues, you might be thinking about switching up your soil and fertilizer. But with so many brands and options available, how do you know which is the best for your bonsai? 

NBF Co-President Jack Sustic spoke with us about the myriad choices for the second installment of our Bonsai Basics blog series. Sustic said there isn’t a panacea to rely upon – if you ask 10 people what their preferred mix is, you’ll get different answers from each.  

Bonsai soil is no different than Grandma’s biscuit recipe – all the grandmas have a different one and it is better than the other grandmas’ recipes,” he said. 

The type of soil you need first depends on the tree you’re working on. Sustic said deciduous trees typically like soils that retain moisture well, while evergreens like pines and junipers prefer slightly drier mixtures. But don’t be mistaken – using a drier mixture doesn’t mean you should adjust the amount of water you’re giving the tree because the soil types absorb water differently.

“If you put an evergreen in a mix that’s extra dry and you don’t water it that much, it could be dangerous for the tree,” Sustic said. “If we have a deciduous tree in a mix that retains water pretty well and we have a conifer in a mix that drains really well, I end up watering them the same.”

Getty Images

Getty Images

The chemistry of it all

Soils are amalgamations of nutrients and materials like sand or bark. Some bonsai artists buy premixed soil formulas and others forge their own. 

Sustic usually prefers to mix his own from local ingredients, first sifting the finer particles from a store-bought potting mix, then adding pine bark and a combination of filter sand and pumice in ratios dependent on the type of tree that needs soil. The more sand and pumice you add to a mix, the faster water will drain from the soil, Sustic said. 

“The goal here is to have good drainage, and I don't want the real fine stuff in the potting mix to clog up the drainage holes,” he said. “Maybe I'll have one part sand in a deciduous mix, and I’ll add two parts for the pine because it likes to be a little drier.” 

But Sustic said someone new to bonsai who is only repotting once every two or three years would find buying a bag of soil the easiest method. Akadama, a type of clay soil from Japan, is the best performing premixed bonsai soil and will last years for people with small bonsai, like shohin.

When determining which soil will suit your bonsai best, Sustic’s main piece of advice is simply to avoid any heavy mixes. Sifting out fine particles from premixed soil is a must to ensure that your soil drains well and keeps your bonsai healthy, he said.

“Sand doesn’t hold nutrients very well at all,” Sustic said. “If you planted a tree in sand, you would have to fertilize it a lot because it doesn’t hold the nutrients. Potting mix and pine bark hold a lot of nutrients.”

Screenshot 2020-04-22 at 2.54.33 PM.png

The nitty gritty of fertilization

Fertilization techniques also range far and wide. 

Sustic uses a combination of fertilizers, switching up his materials with the seasons. He tosses rapeseed fertilizer pellets on his evergreens in the winter. But he fertilizes with Miracid, a liquid that he mixes with water, once deciduous trees have budded out in the spring and summer to help make up for the high pH levels in his water. 

Some people use organic fertilizers, like cakes or a fish emulsion, to prevent salt from building up in their soil, which can happen with commercial fertilizer and is dangerous for your trees.

“Salt can inhibit the tree's uptake of water, so the tree can’t transpire as fast,” he said. “The most common sign of salt damage is burned leaf margins.”

But Sustic said incorporating the horticulture technique of fertigation, or mixing fertilizer into water and flushing the soil with each watering, eases his worries about salt build up. He added that commercial brand fertilizer, like Miracid or Peters, immediately provides nutrition for bonsai, while organic mixes can take longer to produce an effect. Sustic often cuts the suggested measurement in half to avoid excessive fertilization and uncontrollable growth.

“If they say one tablespoon per gallon I use half a tablespoon per gallon,” he said. “I want them to be healthy but not growing too fast.”

Now that you’re equipped with soil and fertilizer knowledge, you’re ready to help your bonsai grow strong. Share your progress by tagging us on Facebook, Instagram or Twitter!

Photographing Bonsai with Stephen Voss: Searching For Order in Bonsai

As a photographer who now makes a living snapping pictures of some of the world’s most influential figures, Stephen Voss didn’t always know that photography could be more than a hobby.  Once a bonsai novice, he certainly didn’t think he would publish a photography book of bonsai.

Now that he’s an accomplished photographer, Voss wants to share his “tricks of the bonsai photography trade.” This entry is part of his regular guest blog series, “Photographing Bonsai with Stephen Voss"," published on NBF’s blog, covering everything from lighting, angles and mindset needed when photographing the trees. Sign up for our newsletter and follow us on Facebook and Instagram to never miss one of his entries! Read his last entry here.


I’ve been researching the work of an early nature photographer named Eliot Porter for the photography newsletter I write. Porter was one of the first nature photographers to use color film and a contemporary of Ansel Adams, a renowned photographer and conservationist. But Porter’s work did not feature the bold colors and blazing sunsets of today’s nature photographers. Instead, he sought subtlety and interrelationships of color and form. 

Later in his career, Porter read James Gleick’s “Chaos: Making a New Science,” recognizing in the text the scientific theory that had guided his career and visual thinking. He then published “Nature’s Chaos,” a collection of photographs from the natural world, which sought to reconcile his work and these scientific ideas. In the introduction, he explains this idea:

Although subjects such as mosses, lichens or leaves that have just fallen are not orderly at all, when viewed as detailed sections, they become orderly. This process suggests a tension between order and chaos. When I photograph, I see the arrangement that looks orderly, but when you consider the subjects as a whole or on a larger scale, they appear disorderly. Only in fragments of the whole is nature’s order apparent.

bonsai 1.png

Where this gets interesting to me is with bonsai, which are, to varying degrees, sculpted by the human hand and meant to be seen as a wholly arranged object. A bonsai master guides the trees on a path to order, but it’s an ever-evolving relationship that may take unexpected turns. Much of my bonsai photography is a search for order, picking out the most aesthetically pleasing parts of a tree while trying to acknowledge and appreciate the basic chaos ever-present in the nature world.

So how does one find visual order when photographing bonsai? To demonstrate, I’ll use some photographs of this beautiful Japanese Beech that has been in training since 1945 and was donated to the Museum by Kiyoshi Kawamata.

My first image of the tree looks like this:

Bonsai 2.png

Here we see a beautiful forest-style planting with at least 16 individual trees (and a young Museum visitor in the background). 

To find order, we’re going to use all of the tools of photography that are at our disposal. This includes available light, exposure, lens choice and depth of field.

Now Here’s a first attempt at bringing some order to this image. I decreased the exposure so the background would darken. This helps the grayish-white branches to stand out more.

bonsai 3.png

I also recomposed the image. Notice how more of the individual branches are now isolated against the dark background? I’ve circled those gaps here in red. Our brains are designed to look for contrast, to delineate based on light and dark tones. By darkening the image and composing it to allow more of the branches to stand out, I’ve already introduced a bit of order and made a more visually interesting photo.

Let’s take it a step further. I’ve changed to a longer lens for this image (180mm macro) and lowered my tripod. In this image, the tree trunk that’s slightly off-center is the main focus:

bonsai 4.png
bonsai 5.png

As I continue perusing the tree, I see some younger branches that are growing off to the right side of the pot. Using low depth of field, I’m able to isolate them against the soil at the bottom of the pot. 

Here’s my first image:

bonsai 6.png

But I’m wondering if there would be a more visually impactful way to show the beautiful curve of this branch. By recomposing so that the branches are seen against the black platform the trees rest on, it stands out even more, as seen here:

bonsai 7.png

I’m not sure which of these images I like more. But trying out ideas is important when you’re taking photographs, not making too many judgments in the moment, knowing that you’ll be able to review the images later and determine what was successful.

Thanks for following along. I hope you all are staying safe and healthy. While the Museum may be closed, you can use the ideas I talked about here on gardens, trees and even houseplants. Learning to see order in the chaos of nature allows you to bring a new visual acuity to your photographs.

Repotting the World-Famous Yamaki Pine

Yamaki Pine at the Museum (Photo courtesy of USDA Agricultural Research Service, US National Arboretum)

Yamaki Pine at the Museum (Photo courtesy of USDA Agricultural Research Service, US National Arboretum)

National Bonsai & Penjing Museum and U.S. National Arboretum staff have repotted the Yamaki pine, one of the world’s most eminent and symbolically powerful bonsai.

Almost 400 years old, the Japanese white pine has survived generations of travel and travesty, most famously the 1945 bombing of Hiroshima where the tree sat in late bonsai master Masaru Yamaki’s garden. Yamaki donated the pine in 1976 as part of Japan’s bicentennial gift to the American people – the gift that created the Museum.

Museum Curator Michael James alongside former First Curator’s Apprentice Andy Bello worked with Patrick Lynch and Bradley Evans, two Arboretum staff members, to repot the magnificent tree on March 26. James spoke to NBF about the logistics of the repotting.

Last repotted in 2015, the tree’s soil had compacted so much that water had begun to run off the surface of the soil and barely soak in. Sometimes the water might take up to 15 minutes to infiltrate the pine’s root ball, which is a sign that repotting is needed, James said.

The particles of Akadama, or the granular, clay-like type of soil used to plant the Yamaki pine, had compacted from their usual ball-shaped structure to very small, clay-sized fines, blocking water and air from traveling throughout the root ball.

“When the soil gets that dry, it becomes almost like a brick, and then there’s no oxygen in the soil for the roots to breathe and they rot,” James said.

Finding dead roots and compacted soil could derail the repotting plan, raising issues that have to be dealt with on the spot instead of the intended process. 

“It’s hard to do everything you want to do in one repot,” James said. “This one went really well and pretty much as expected. We found healthy roots all around and a really strong mycorrhizal network of beneficial fungal surrounding the roots.” 

Yamaki Pine’s exposed roots (Photo courtesy of USDA Agricultural Research Service, US National Arboretum)

Yamaki Pine’s exposed roots (Photo courtesy of USDA Agricultural Research Service, US National Arboretum)

The process

In preparation to remove the pine from its pot, James, Bello and the staff members pushed the tree off of its pedestal and onto a hydraulic lift cart. 

The tree and container weighed somewhere between 200 and 300 pounds, requiring the group to use straps – cushioned with a towel to distribute the pressure point and weight of the pine – to secure the tree to a beam on the roof of the Japanese Pavilion.

The group then carefully cut between the rim of the pot and the edge of the soil ball a few times to release the ball from the pot. Because the Yamaki pine is so large, the group couldn’t simply lift the pine from the pot. They had to lower the hydraulic cart from under the tree and carefully catch the pot as it fell away, freeing the tree, James said.

“The tree looked like it was floating, especially when you’re not looking up to see the strap and the root ball is suspended from the bottom of its trunk,” he said. “It’s a very surreal image because trees don’t float this way and they’re never positioned like this.” 

Tools used during the repotting (Photo courtesy of USDA Agricultural Research Service, US National Arboretum)

Tools used during the repotting (Photo courtesy of USDA Agricultural Research Service, US National Arboretum)

James said that, during the winter, the pot had been enclosed in a mulch box, which buffered the pine’s roots from cold temperatures over the past few years, so the bottom and sides of the soil were in good shape. The surface soil, which the mulch did not cover, contained the least healthy roots, so the team used awls, small hooks and brushes to slowly break up that compact area. 

“It's a little bit like art restoration and a little bit like archeology,” James said. “It’s slow, a little tedious and you have to be really careful that you are removing soil and not roots.” 

One challenge the group faced was clearing away old roots that had died without removing healthy new roots or disrupting “essential” symbiotic relationships the tree had formed with other organisms. 

James said mycorrhizal fungi, a white cottony material found among tree roots (see last photo below which shows the white mycorrhizae), feeds off of sugars the pine’s roots created. The pine then benefits from moisture and nutrients the fungus pulls into the roots, so the team had to ensure that some of the fungus remained.

“When you break up that soil, you destroy or hamper that relationship, and it has to regrow,” James said. “The relationship between the roots and the fungus has to remain intact for the pine to stay healthy.” 

He added that no specific date is set for the next repotting, but the process could happen again between the next three to seven years, depending on how the pine recovers from this repotting, how well water drains through the soil and the tree’s overall health. 

“You want to do these repots few and far between on an old tree like this,” James said. 

Yamaki Pine at the Museum (Photo courtesy of USDA Agricultural Research Service, US National Arboretum)

Yamaki Pine at the Museum (Photo courtesy of USDA Agricultural Research Service, US National Arboretum)

Andy Bello with the Yamaki Pine during the repotting (@bellcraze).

Andy Bello with the Yamaki Pine during the repotting (@bellcraze).

NBF Taps Sophia Osorio for 2020 First Curator’s Apprentice

Screenshot 2020-03-20 at 3.40.09 PM.png

We are pleased to announce the hiring of the NBF 2020 First Curator’s Apprentice, Sophia Osorio. 

Robert Drechsler served as the first curator for the National Bonsai & Penjing Museum from 1976 to 1998. During the celebration of the 35th anniversary of the Museum in 2011, NBF established an internship – called the First Curator’s Apprenticeship – to honor Robert’s many years of service. The apprenticeship aims to train the next generation of American bonsai artists.

Sophia, who started on March 10, said a previous internship at the Central Park Conservancy in New York City first piqued her interest in wanting to work outside.

“I’ve known since graduating college that I never wanted an office job,” she said. “I wanted to be outdoors doing hands-on work.”

Sophia, 23, said her passion for trees first came to light during an environmental ethics course she took during her undergraduate education at Binghamton University in New York. She learned about the philosophical side of the environment, like how society’s carbon footprint affects Earth. 

“It sort of inspired me to want to make a difference in my own small way,” Sophia said.

She said she first became interested in bonsai during an arbor culture certificate program she took part in at the New York Botanic Garden in the Bronx. Sophia said she saw the posting for the apprenticeship at the garden and decided to apply. 

“I’m still trying to find a specific career path, like what I would like to do specifically with trees, because I feel like the options can be endless,” she said. “Bonsai have a visual aesthetic to them. I thought that was super interesting to learn more about, like pruning and care and things like that.”

Sophia said she has spent her first week working closely with Museum Curator Michael James, jotting down notes and tips about the trees she will be working with for the next year. 

“There’s so much care and many different tactics that go into keeping trees alive for so long, like the Yamaki Pine,” she said. “Some people can’t even keep houseplants alive, so I think that’s amazing and it’s definitely a skill I would like to pick up on.”

When she isn’t learning about the Museum’s collections, Sophia keeps active with trips to the gym, hikes and long walks. She recently visited the Redwood Forest in California. 

“You can leave me in a national park for hours and I'd be fine,” Sophia said. “I'm down for anything outdoors.”

We look forward to all Sophia will contribute to the Museum in her capacity as First Curator’s Apprentice. A special thanks to our 2019 apprentice Andy Bello, whom the U.S. National Arboretum has hired as a temporary agricultural research science technician.

The National Bonsai Foundation is looking for a new funding source for this program. Please contact us if you are interested.

Bonsai Basics: Repotting Techniques and Tools

Bonsai Basics is a NEW blog series dedicated to providing beginner’s tips, tool recommendations and facts about basic bonsai tasks.
Thanks to all of our readers who recommended we start doing this on our 2019 survey!


Photo Credit: Bonsai Empire

Photo Credit: Bonsai Empire

There’s the holiday season, spring cleaning season and back-to-school season – but as a bonsai beginner, there’s one season you should really familiarize yourself with: repotting season. 

You might have a lot of questions about when to repot, what to use to repot and how repotting works. We spoke with NBF Co-President Felix Laughlin about the basic tools and steps you need to get your repotting off to a great start this spring.

“We’re at the critical point where most bonsai are about to leaf out if they haven’t already,” Laughlin said. “This is when the bonsai are the healthiest for repotting and cutting back roots.” 

He said younger bonsai should be repotted each year, but more developed trees can wait longer. 

“Repotting is like renewing the life of the tree and giving it a chance to live a lot longer than it would growing in the ground,” Laughlin said. “That’s why you have 1,000 year bonsai – repotting helps bonsai roots not wrap around the pot, get old and stop feeding the tree.” 


How to Tackle Repotting

An eight-piece tool kit featuring the snips, three-pronged ranks, sickle and pliers discussed below. Available on bonsaioutlet.com for $69.95.

An eight-piece tool kit featuring the snips, three-pronged ranks, sickle and pliers discussed below. Available on bonsaioutlet.com for $69.95.

The first step to repotting your bonsai is cutting the wires tying the tree into the pot. Grab your root hook and transplanting sickle or scythe – a curved, sharp saw or cutting edge – and saw or cut around the edge of the pot to remove the root ball without tearing it apart.

Then use a three-pronged root rake to scrape the bottom of the root ball, removing soil and exposing the downward-growing roots.  For root balls removed from deep pots, you may first need to use the curved sickle or a saw to cut off the bottom portion of the root ball.

Next you’ll want to use some scissors or hand snips to cut back the exposed roots, including those growing laterally around the sides of the root ball. You might use bent-nose tweezers and a root hook to help untangle the roots.

This seven-piece tool kit includes: root cutters, root rake, sickle, angled scissors, broom, bent-nose tweezers and root hook. Available on bonsaitonight.com.for $135.

This seven-piece tool kit includes: root cutters, root rake, sickle, angled scissors, broom, bent-nose tweezers and root hook. Available on bonsaitonight.com.for $135.

But pay attention to which kind of bonsai you’re working on. Laughlin advises that the roots of deciduous bonsai can be cut back harder than those of evergreen bonsai. 

“It’s a balancing act,” Laughlin said. “You want to rejuvenate the roots without diminishing the ability of the tree to recover.”

Next, place some fresh soil into your pot and tie the tree back in with wire, pliers and wire cutters. Laughlin said any pair of pliers from a hardware store will work, but some technical bonsai pliers offer more precision – though they cost more. 

Watch bonsai master Boon Manakitivipart as he demonstrates some of these repotting steps and illustrates the use of the repotting tools. 

Sickles, three-pronged root rakes and root hooks generally each sell for around $10.  Laughlin likes the Okatsune heavy-duty hand snips, which can be found at Bonsai Outlet for $40. 

“They’re top-notch Japanese shears that are great for cutting heavy roots and getting the root ball back down to where you want it,” Laughlin said.

Bonsai tools can rack up a lengthy bill, but Laughlin said you can cap your costs at about $100 if you do your research. He said not many brick and mortars offer kits with all the tools he discussed, but you can find reasonably priced starter sets or individual tools on sites like Amazon, Bonsai Tonight, Bonsai Learning Center, Stone Lantern, Bonsai Outlet and Brussel's Bonsai.  


When Should You Start Repotting?

NBF Co-President Jack Sustic works with NBF board member Dr. Joe Gutierrez to repot a bonsai.

NBF Co-President Jack Sustic works with NBF board member Dr. Joe Gutierrez to repot a bonsai.

NBF Co-President Jack Sustic said you’ll want to repot deciduous trees first, which grow more vigorously and sooner than conifers, which are generally ready for repotting in late April. 

Sustic said the repotting season can change depending on where you live – someone in South Carolina might be done with repotting for the year but someone in Michigan could just be getting started. Sustic says to start repotting once buds have started to swell up and gain a bit of color. 

For Sustic, the frequency of repotting depends on the tree itself. Your bonsai likely needs repotting if water sits on the soil and doesn’t drain well or if the overall health of the tree is poor.

“I look at it from a horticulture standpoint,” Sustic said. “Questions like, ‘Is the tree healthy, is it growing, is the soil draining well?’ Ultimately, the tree will tell you when it’s ready to be repotted.”


Check out our Youtube page for a demonstration by Danny Coffey repotting a boulevard cypress.

COVID-19 Response

UPDATED JUNE 8:

Beginning June 8, the U.S. National Arboretum in Washington, D.C., will reopen with operational changes in place to protect staff and federal resources. The new schedule will see the Arboretum open from 1 to 5 p.m. on Mondays, Wednesdays and Fridays. Entry to the grounds will be provided via dedicated access points and there will be limited services and amenities during this time.

The Administration Building/Visitors Center and the Museum will remain closed for now until further notice.

Arboretum visitors will be required to follow all posted guidelines designed to maximize the safety and health of all visitors and employees, including social distancing rules. For more information on new operating hours and a listing of accessible areas, potential visitors are encouraged to review the Arboretum website at www.usna.usda.gov.

While the Museum remains closed, you can virtually enjoy the peace and beauty that our beloved collections and serene space offer through regular blogs, our website photos and our website.

Also, if you are not already, we invite you to subscribe to our e-newsletter and receive monthly messages about the art of bonsai, our collections, and the bonsai community around the world.

NBF Board Member Passes Away at 94

Jack Wells, middle, while volunteering at the Museum in the late 1990s with (right to left) David Gavin, Jack Cardon, former assistant bonsai curator Dan Chiplis and Warren Hill.

Jack Wells, middle, while volunteering at the Museum in the late 1990s with (right to left) David Gavin, Jack Cardon, former assistant bonsai curator Dan Chiplis and Warren Hill.

The National Bonsai Foundation is sad to announce the passing of former Board of Directors member Jack Wells. 

Wells was an establishing member of NBF in 1982, served on the Board for many years and previously held the top post at the Potomac Bonsai Society. 

“Jack’s dedication to and history of the Museum was evident from the start,” NBF Co-Presidents Felix Laughlin and Jack Sustic said in a letter to NBF board members. “As a friend, mentor to many and bonsai leader, Jack played a significant role in the development and appreciation of the art of bonsai in our nation’s capital.”

Jack and his wife Kathi at an NBF reception in 2011 talking to the U.S. National Arboretum’s then-Director Tom Elias.

Jack and his wife Kathi at an NBF reception in 2011 talking to the U.S. National Arboretum’s then-Director Tom Elias.

Born in Independence, Oregon in 1925, Jack grew up on the family farm which eventually became a century farm. He graduated from Oregon State University in 1951 from the College of Agricultural Sciences with a major in horticulture, according to his obituary.

Through the International Foreign Youth Exchange program, Wells traveled to Bolivia where he discovered his love for agriculture. While working with the USDA as an Agriculture Marketing and Seed Specialist, Wells traveled to 68 different countries to educate on agriculture improvement techniques. He also worked for the American Seed Trade Association, according to his obituary.

He is survived by his wife Kathi, four children, two stepchildren and 16 grandchildren, his obituary states.

A GUIDE TO BONSAI: Forest Bonsai Presentation

Creating Forest Bonsai: A Relatively Easy & Inexpensive Way to a Lifetime of Bonsai Enjoyment

Our Co-President, Felix Laughlin, gave this presentation on November 10, 2019 at the Blue Ridge Bonsai Society in Asheville, NC, as part of their regular education program for club members. We wanted to share it with you.

Laughlin created this presentation in order to do two things:

1.) To show how easy and relatively quick it is to create a forest bonsai using young seedlings.

2.) To raise awareness around the late Saburo Kato, a Japanese bonsai master who made possible the 1976 Bicentennial bonsai gift that lead to the birth of the National Bonsai & Penjing Museum. Throughout the presentation, Laughlin cites Kato’s classic book on forest bonsai plantings, Forest, Rock Planting & Ezo Spruce (Translated into English and published by NBF - Available for purchase here).

The seedlings Laughlin used were Stewartia seedlings grown and donated for the demonstration by Sage Smith. As you will see from the photographs, his fellow club members were a big help with every stage of the process, from preparing the young trees to tying them down in their proper place in the container.

Enjoy!

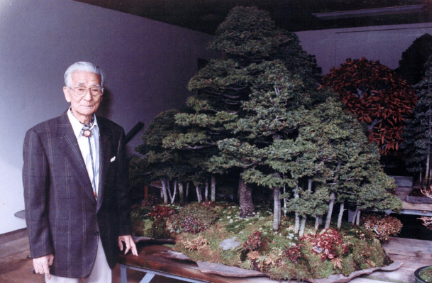
A 2001 Photo of Saburo Kato at Mansei-en

A 2001 Photo of Saburo Kato at Mansei-en

Saburo Kato with Forest Bonsai at Mansei-en

Saburo Kato with Forest Bonsai at Mansei-en

Historical Tree Spotlight: Pasture Juniper

The Juniper as it stands in the National Bonsai & Penjing Museum today. Photo credit: Stephen Voss.

The Juniper as it stands in the National Bonsai & Penjing Museum today. Photo credit: Stephen Voss.

Bonsai are often developed from seedlings or collected from nature. But this month’s Historical Tree Spotlight features a tree with a unique cultivation story.

Jack Douthitt, a prominent Midwestern bonsai master, retrieved this juniper from a cow pasture in South/Central Wisconsin. But before collecting the tree, Douthitt spent time training the juniper in the pasture, preparing it to be dug up so the tree had time to heal and recover from Douthitt’s initial cuts. Museum Curator Michael James said digging up the tree first may have resulted in lost branches and would have prolonged the tree’s recovery.

“Trees in the ground are much more strong and vigorous – they heal quicker,” James said. “Once it’s in a pot, growth is much, much slower. Those preparations he made in the field allowed him to collect the juniper and get it on the fast track to being a bonsai.” 

Douthitt belonged to myriad local, national and international bonsai clubs, including Bonsai Clubs International, American Bonsai Society, Milwaukee Bonsai Society and Minnesota Bonsai Society. The National Bonsai Foundation recognized him in 1987 as “One of America’s Outstanding Bonsai Artists.” 

Douthitt previously studied art and architecture but deviated from that background after discovering the world of bonsai. 

“Once a painting is finished, I lose my emotional involvement with it,” he once said. “In bonsai, the creative process never stops, and the emotional involvement with it never ends.”

Douthitt’s juniper is native to the Midwest and resides in The National Bonsai & Penjing Museum’s North American Collection. The tree retains its small foliage throughout the year and forms both male and female cones as an adult tree. James added that some junipers naturally grow very low to the ground, crawling much wider than they do tall.

The juniper was repotted from its original rectangular pot to a more shallow, oval pot to better complement the tree’s figure. “That round shape of the pot really harmonizes with the trunk’s curves, whereas the old, rectangular edge just didn’t fit with those rounded trunks and branches,” James said.

While the tree technically falls under the evergreen category, James said the juniper’s branches cycle through a few different colors throughout the seasons. In the spring, the juniper sports lime green new buds that contrast against dark green older leaves, but the tree transforms into a deep green in the summer. 

According to James, the juniper turns almost bronze-like when the cold starts to drift in during autumn, and its leaves develop a purplish color when the tree enters a deep dormant state in the middle of winter.

Left: The bonsai in the 80s before it was donated.Right: The juniper shortly after it was accepted into the North American Collection.

Left: The bonsai in the 80s before it was donated.

Right: The juniper shortly after it was accepted into the North American Collection.

“It’s neat,” he said. “It’s a cute little tree.”

James added that the juniper tends to take well to pinching when new growths sprout in the spring. Once pinched, the tree forms a proliferation of buds and stays quite dense

The twisted deadwood that travels up the side of the tree embodies the Japanese concept of “shari.” Douthitt intentionally created the streak of deadwood and multiple jins, or dead branches, to mirror the harsh conditions – like lightning, sun, wind or animal disturbances – that would kill a strip of the bark in the juniper’s natural setting.

“Snowstorms or ice in the wintertime blow up against the side of a trunk, or an animal or something steps on a branch, which is going to rip and tear the bark away, naturally creating those sharis,” James said. “This one was probably done by the collector, but it could very easily have been found that way as well.”